pertcare
how can we help?

Getting started

Service

Devices

Billing and payments

Account Management
FREQUENTLY
ASKED QUESTIONS
How do I get started with MobileX?
Welcome! We are excited to have you join the MobileX family. We have made the process to join MobileX as simple and enjoyable as using the app itself.
Just follow the steps below to join:
• Download the app
• Create a MobileX account
• Select from one of our 3 plan type options
• Transfer your number or get a new number
• Provide additional details and get activated
Plan options
MobileX has 3 different plan type offerings.
• NEED A HAND?
• UNLIMITED plans
• BUILD YOUR PLAN YOUR WAY
NEED A HAND?
You live, we learn. As you use your phone our Mobilex Al Forecaster learns your usage patterns and suggests the best option to suit your needs, in just 10 days or less. You can select a completely custom-built plan-or one of our Unlimited options-the choice is yours. And adjust or switch your plan anytime you like, right in the MobileX app.
While we have several plan options, we recommend most people go through the $4.88 NEED A HAND? since a one-time credit of up to $4.88 will be applied to the cost of the plan selected after the learning period ends.
Note: The 10 day or less Learning Period does not include Mobile Hotspot.
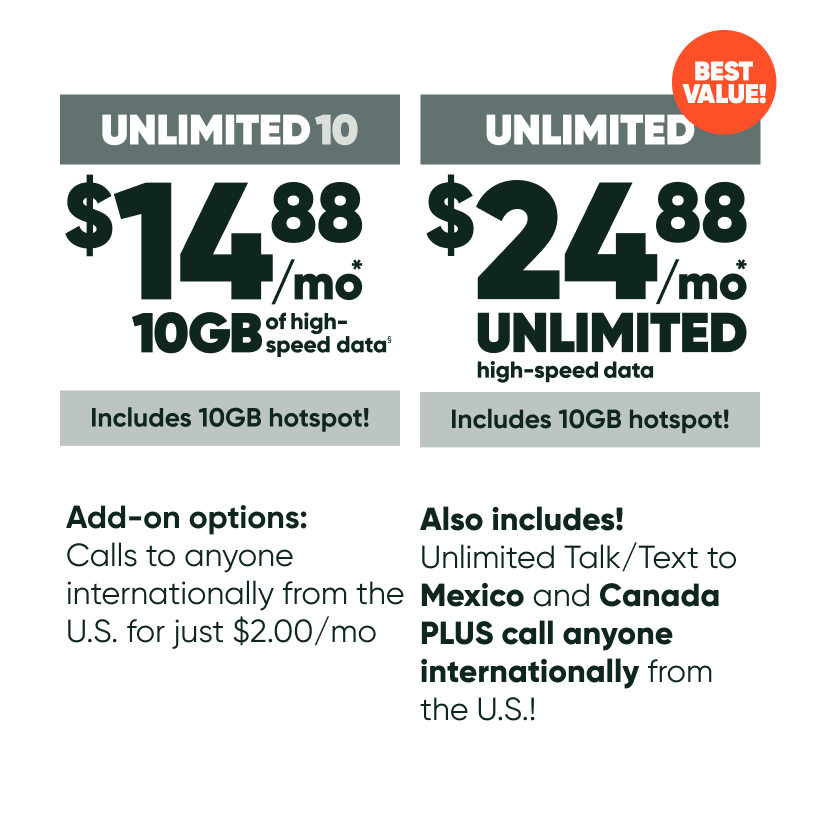
Basic Unlimited
Much like you’ll find at other carriers, we offer basic unlimited plans as well. These plans come with a set amount of high-speed data before being slowed down. As the name implies, they are unlimited. With the traditional style of these plans, you pay the same each month regardless of how much data you use.
Basic Unlimited Pricing
There are two plan offerings
Basic Unlimited 10GB: $14.88
Basic Unlimited 30GB : $24.88
Note: Prices listed are before taxes and fees.
- Unlimited Talk & Text*
- Wi-Fi calling**
- Visual Voicemail
- High-speed data***
- Premium data top-ups
- Hotspot
- Video Optimizer****
* Unlimited includes Nationwide unlimited calling and texting
** Wi-Fi calling requires a compatible device
*** Once high-speed data is used up, speeds are slowed to 3G (512Kbps) speeds
**** Video speeds optimized for 480P Standard Definition
Build Your Plan Your Way
With BUILD YOUR PLAN YOUR WAY you can create any data/talk/text combo–including international–all in the app! Even better is you will only ever pay for what you use. The way this works is that unused mobile data gets converted into a bill credit on your next month’s renewal. What’s also awesome is that we give you the ability to tweak the plan to your liking.
What you get with Build Your Plan Your Way
• Premium data from one of the fastest 5G networks in America
• Video Optimizer**
• Visual Voicemail
• Premium data top-ups
• Wi-Fi calling***
• Data rollover˚
Pricing structure for BUILD YOUR PLAN YOUR WAY
Platform fee: $1.98
Talk/Text packages§
• No Talk/Text: $0
• 75 minutes Talk/Text: $2.00/mo
• 350 minutes Talk / 400 Text: $3.00/mo
• Unlimited Talk/Text: $4.50/mo
Data
• Standard data: $1.90/GB
• Priority data: $2.10/GB
• Leftover data converts to credit and is deducted from your next month
Add-ons
• Unlimited Talk/Text to Mexico and Canada: $4.50/mo
• Call anyone internationally from the U.S. to 100+ countries: $2.00/mo
• Spam filter: $0.50/mo
• And many more…check within the app!
Note:
* Prices do not include taxes nor government surcharges that may be applicable and will be applied at checkout. Restrictions and terms apply.
** 480p, 720p, 1080p, or 4k, higher resolution will use more data. Video speeds optimized for 480p standard definition.
*** Wi-Fi calling requires a compatible device
**** Once high-speed data is used up, speeds are slowed to 3G (512Kpbs) speeds.
†Unlimited high-speed data is subject to Fair Use policy.
˚ Any data you don’t use as part of Build Your Plan Your Way, will roll over as a monetary credit to the next billing cycle.
§ All Talk/Text packages are subject to applicable taxes
STILL NEED HELP?
We’re a new model of mobile service, so it’s natural that you might have questions along the way. To connect with a live XpertCare rep, drop us a note via email or call us on 833-422-1053.